Monday, February 6, 2012

Homemade Laundry Detergent

Ever feel like all you do is laundry? It has started to get out of hand at our house with my daughter deciding she needs to change her outfit at least twice a day. Couple that with increasing food/gas/living costs and I am on a mission to reduce how much we spend.

There are a lot, I mean A LOT of recipes out there for homemade laundry detergent. Since the same ingredients kept showing up in different formulations, I threw caution to the wind and combined them all into my own recipe.


                                                                                              Source: sewlikemymom.com via Kim on Pinterest

I started out with the basics:
- Borax
- Super Washing Soda
- Fels-Naptha
Most powered recipes call for these ingredients.

I also added:
- Generic oxyclean
- One bar or ivory soap (because I was planning to make a lot)

Add one tablespoon for each load.

                                                                                                    Source: ehow.com via Sarah on Pinterest

I shredded the bars of soap in my food processor and then chopped it up some more with the blade that goes in the bottom of the food processor, then added three cups each of the powders. I have more left over but I thought before I go hog wild I would see how well it cleans.

I have read mixed reviews on if this detergent is safe for cloth diapers. Since my daughter is rarely wearing a diaper any more this isn't a big concern for me, but if anyone else digs further than I did a gets a definitive answer I would love to find out.

After an afternoon of laundry everything looks clean and smells nice. I read somewhere that it breaks down to about nine cents a load versus twenty-one if you are using Tide or something similar. That doesn't seem like that big a difference but if you do one load a day for 365 days you are looking at $32.85 vs $76.65!

I spent more time trying to find the "right" recipe than it took me to make the detergent. Now I am motivated to make my own dishwasher detergent and granite cleaner.  An easy 5 pins!


Sunday, January 29, 2012

Yarn Letters


Another monogrammed-themed project, looks quite simple to the unknowing eye.  This original pin makes this craft look simple and seems like a great project to use up that old yarn that you have lying around. Don't knit or crochet?  (me neither)  Yarn is fairly inexpensive to pick up at your local store. 

So, I gathered my yarn, letters (I was doing "love") and hot glue in case I needed it.  What happened next doesn't happen to me very often.  I created a horrible craft.  I think if I had about 3 trials of how to wind the yarn and where to place it, I could have gotten this accomplished.  I also tried to do 4 letters, but only finished 1.75 of them after about 3 hours.  Needless to say, the craft is now in a plastic bag somewhere in my sewing room, hiding from view.

I give this craft 2 stars. 


 The time that it takes alone is too much for someone with children and a house to take care of.  I think had I only attempted one letter, I might have given it 3 stars. Even with one letter, the placement of the yarn is enough to overload your brain.  If you would like to attempt this craft, make sure you have LOTS of time and patience on hand:)


Button Monogram


Pinned almost 82 thousand times is this version and others similar to it.  Looks easy, doesn't it?  Keep reading to see if it is:)

This was one of our most famed Cocktails and Crafts project and I am so pleased with how mine turned out.  The original pin was very concise and clear with it's instructions.  I found it easy to interpret her steps and her list of supplies was for the most part things you have lying around the house.

I bought my buttons at JoAnn Fabrics as I didn't have many lying around at all.  I also used fabric instead of card stock, and it worked perfectly.  My frame was one I picked up at the thrift store that was super cheap as it didn't have any glass.  PERFECT for this craft.  You can see my blog post about it here.  I chose a lowercase letter and I love it! 
I am giving this craft 5 pins!!! 
Even having a few cocktails didn't prevent this beauty from coming through.  Supplies are easily acquired at either your home, a thrifty or the fabric store.  From start to finish, you can complete this project in about an hour or so.  Have fun and give it a try today!


Friday, January 20, 2012

Bleach Pen Designs

For my kid's birthday I make them shirts with their age on it. Normally this is appliqued or embroidered but I thought it was becoming a little to feminine for my son. Enter the bleach pen shirt art.

                                                                           Source: showtellshare.blogspot.com via Sarah on Pinterest

When I thought about a bleach pen I thought it would be like a sharpie filled with bleach, it isn't. It is more like a tube of toothpaste that you squeeze the thick bleach out of. I loved the tip to iron on freezer paper to the back side so it doesn't soak through and saved me from this cookie sheet/towel contraption I was going to use. I used a black pen so I let the paste sit overnight and my end results were a nice light orange (not the pink I was afraid of).
I did have a little trouble when an air bubble came out of the tip and created a small halo. Didn't ruin the shirt but I think it would have been nice if that didn't happen. I would recommend that you start with simple designs that allow for some creative mistakes. My son loves his "new" shirt and I think this would be a great way to redesign clothes that have stains on them.

Another five pins! 

Monday, January 16, 2012

Caramel Popcorn

I will just cut to the chase on this one - 5 pins without a doubt. If we had a 6 pin rating this would earn it for sure. So easy to make and big crowd pleaser, this is my new go-to dish to bring to any party.

Here is the original pin.


                                                                                     Source: orangette.blogspot.com via Sarah on Pinterest


The directions were very clear and I have made it twice now with perfect results. I doubled my second batch because it is that good and I know we will want more.

Normally I make my grandmother's molasses popcorn balls but since my husband isn't a big fan of molasses, I end up eating them all.  I still use her technique of putting the popcorn on the counter, and then fluff it up to make all the hard pieces fall to the bottom. I then move all the soft fluffy pieces to a wash bin and add the caramel.

So freakin' good, I may have to do the Shred again today.

Tuesday, January 10, 2012

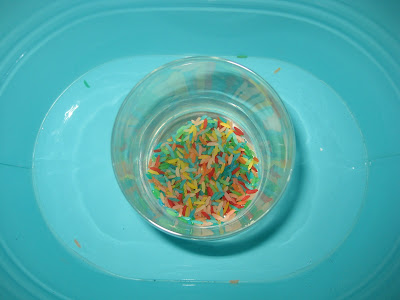
Rainbow Rice Review

Thanks to Carrie for being the first to submit to Pin Do Review! I am glad she was brave enough to attempt this pin.

When I saw this beautiful picture, and then saw the wonderful pictures on this blog, I absolutely HAD to make some rainbow rice for my 3.5 year old to play in.


                                                                              Source: shareandremember.blogspot.com via Carrie on Pinterest

Lacking a tub big enough for the purpose, I went out and bought a tub (with lid), along with a 15 pound bag of rice, 3 packages of food coloring, and some stuff from Target's $1.00 bins.

I decided to start with red.  I measured four cups of rice into a gallon sized ziplock bag.  The directions said to use 3 tablespoons of food coloring and 2 tablespoons of rubbing alcohol.  Well....that has to be wrong.  Through trial and error, I've decided the best amount (per 4 cups of rice) is half a teaspoon of food coloring to 1 1/2 teaspoons of rubbing alcohol.

You do not need to lay the rice in the sun, or spread it thinly to have it dry quickly.  I put aluminum foil on a couple of cookie sheets in my kitchen, poured out one color at a time, let it dry about 10 minutes (stirring around with a plastic fork), gathered up the edges of the foil, and poured it into the tub. The alcohol smell is a little overpowering, but it fades quickly. 

I was amazed that the colors were colorfast.  Nothing bleeds onto hands or clothing.

My son loved it.  He stirred it all up and began to play:  making mountains, making birthday cakes, making roads for his cars, planting a garden, filling ice cub trays. 


BUT it's a huge mess.  Do this in an area that is easy to sweep and not likely to bother you if rice gets all over the place (because it will).  I chose my porch.  It's not too cold here this winter, so he can wear a sweatshirt and play on the porch, but I don't need to worry as much about the mess being in a main area.

All in all, I'm glad I did it.  The rice should keep in that covered tub for quite a while.  I can put it away and then bring it out on days he needs some distraction.

Tips:
-measurements in this are off; see mine above
-rice gets everywhere
-rice is colorfast, and fairly easy to make
-use pure white rice (I used yellow and it affected the colors somewhat)

Carrie rated this three pins.


Thursday, December 15, 2011

Zippered Lined Pouch


Tis' the season for teacher gifts!  Like most days, I have a quest to find something whether it be a recipe or a crafty project or a how-to sewing technique.  Like most instances, Pinterest is the place to remedy such quest.  A few years back before Pinterest existed, I had to figure out on my own how to make a zippered, lined pouch.  I had to make about 30 of them for a baby shower (Yay, Virgie!) and luckily developed a successful technique about 2 pouches into the process.  Had I known I could probably just googled the tutorial, I would have saved myself some grief. However, the technique was permanently imprinted in my brain, so that's a good thing.

My daughter's kindergarten teacher uses her ipad at school on occasion to teach (or so my daughter says). I think that's pretty cool as technology is a close second when it comes to ruling the world (behind money, of course).  For a teacher gift,  I simply refuse to do an apple craft or some sort of pencil/crayon collage and was really searching for something original and useful.  Hence, the ipad cover.  Even if she already has a cover for her ipad (likely), I thought it would still be a good gift and could even be used for a Kindle or similar e-reader.

I logged onto pinterest to find this tutorial via this pin so I could finally get Sarah off my back about holding my weight on this blog.  If I could find a tutorial, then I could review it.  Perfect!  For this craft I picked out a 45" width home decor weight at JoAnn's, lined it with a pretty flannel that was in my stash and in between them used a high quality, low loft, cotton quilt batting that I already had as well.

The pin from Skip to my Lou does a great job of explaining exactly how to make a zippered, lined pouch.  Luckily, it's the same way I devised long ago and is probably the only real way to do it. I really like how she explains the lining up of the fabrics and even shows how she didn't line them up correctly for us "real life" gals.  Here's mine:
Sewed the batting onto the outer fabric before starting

Pinning is really important. Keep those edges alligned!

Here's what it looks like before stitching on the zipper

After stitching on the zipper

Ready to stitch the outsides together

The zipper works!

Finished piece


I am proud to give this pin a "5 Pin" rating for several reasons.  I was able to complete this craft in under an hour, the instructions are very concise, clear and easy to follow with great pictures.  Also, you could potentially have all of the materials in your possession.  If ever you're at a thrift store or yard sale and you see zippers, buy them!  It's always nice to have something like that on hand.

Happy Pinning!